Introduction
Still spending too many hours in your weekend patching servers? Especially in bigger environments it can be very time-consuming, so why wouldn’t you let Azure do it or you?
One of the greatest features within Azure Automation is Update Management.
Azure Update Management is a cheap solution for automatic patching of your Azure and On-Premises machines.
In this blog I will walk you through the installation process.
Server preparation
- Clean up any leftover SCCM policies or WSUS policies that might override Azure Update Management
- Set Windows Update to Manual or Download Only to prevent automatic updates running outside of your Azure schedules. You can do this easily by running “sconfig” in your Command Prompt or within Powershell
- Make sure all the machines you want to patch using Azure Update Management are connected to your Log Analytics Workspace and that this one is primary for the Hybrid Worker registration.
- Make sure outbound port 443 is open
Implementation
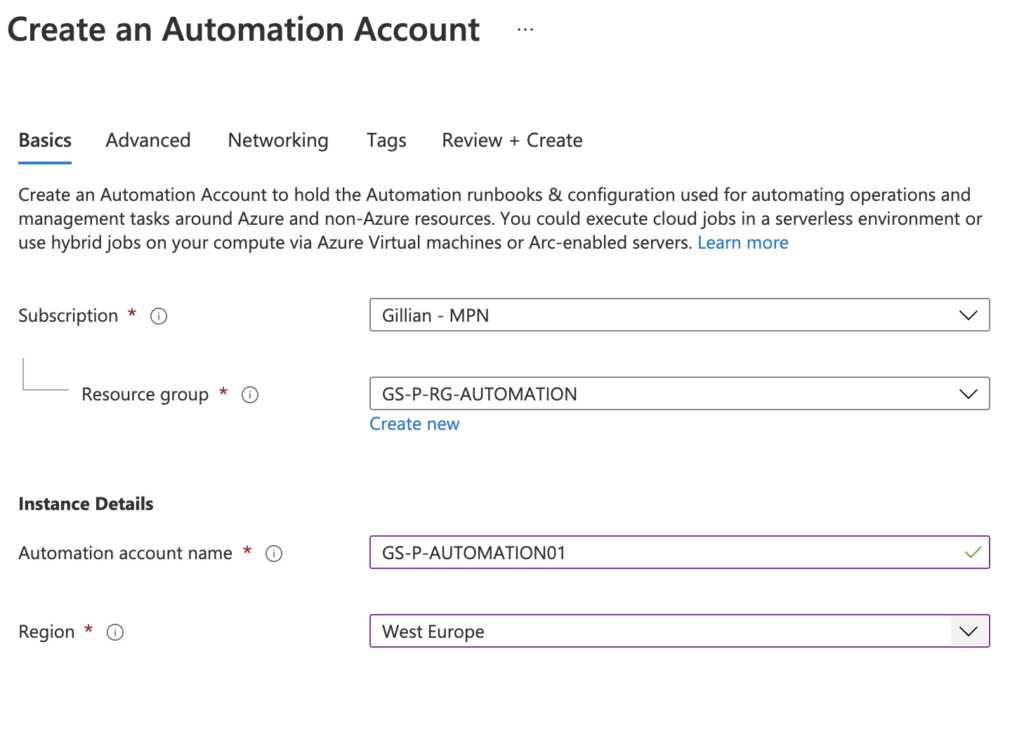
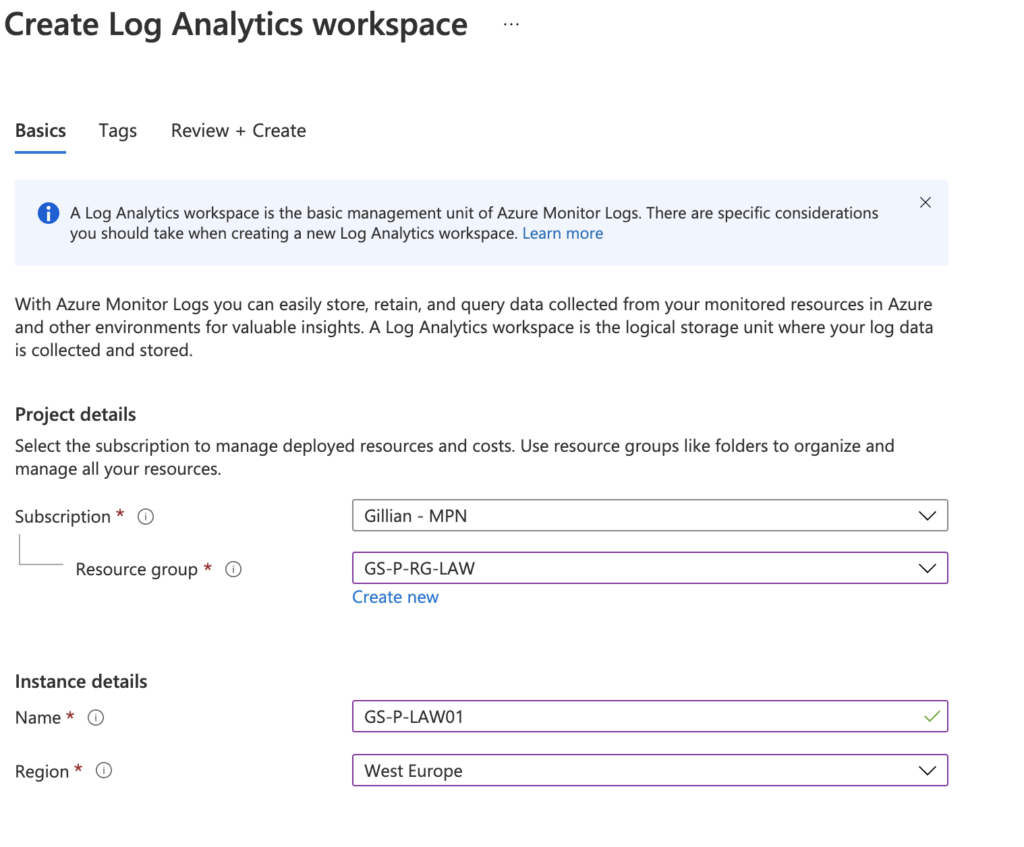
If you don’t have them already first you want to create an Automation Account and an Azure Log Analytics Workspace like the examples below
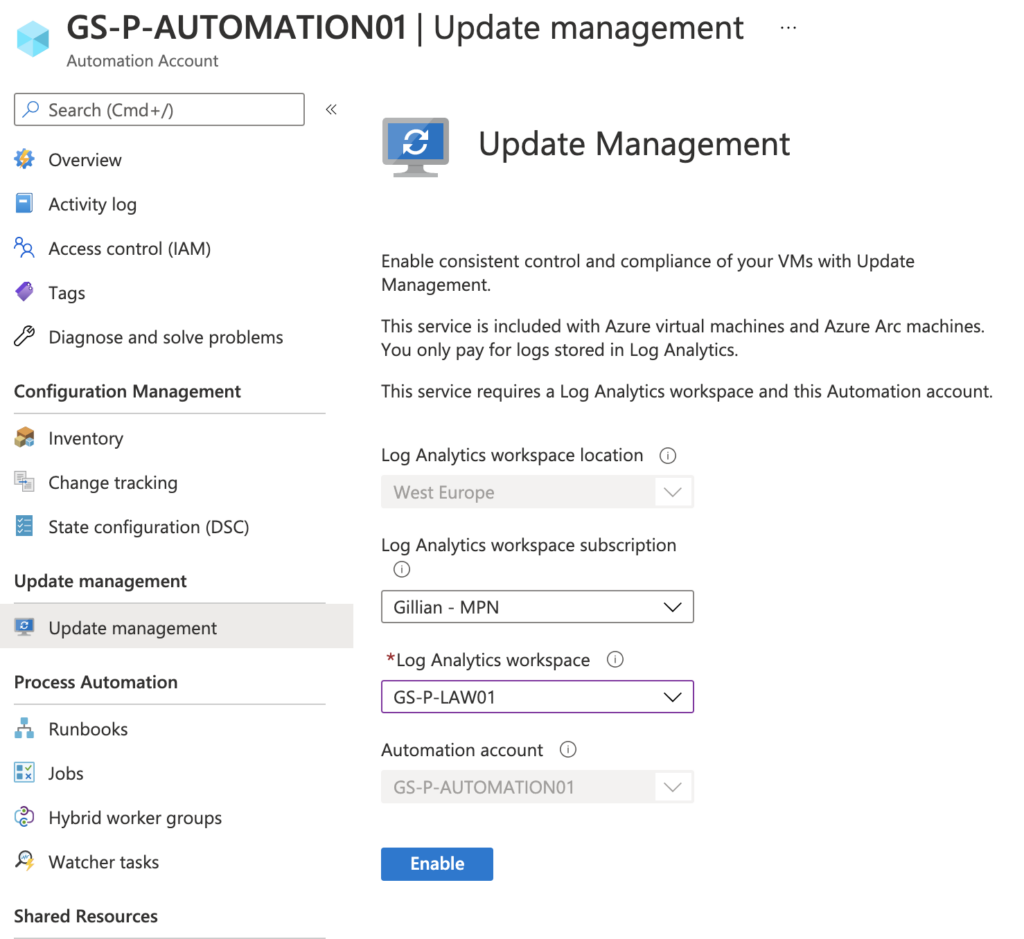
When both resources are deployed and your machines are attached to your Log Analytics Worksapce you can open your Automation Account and enable Update Management. Make sure you select the correct Log Analytics Workspace where your machines are reporting to and click on Enable
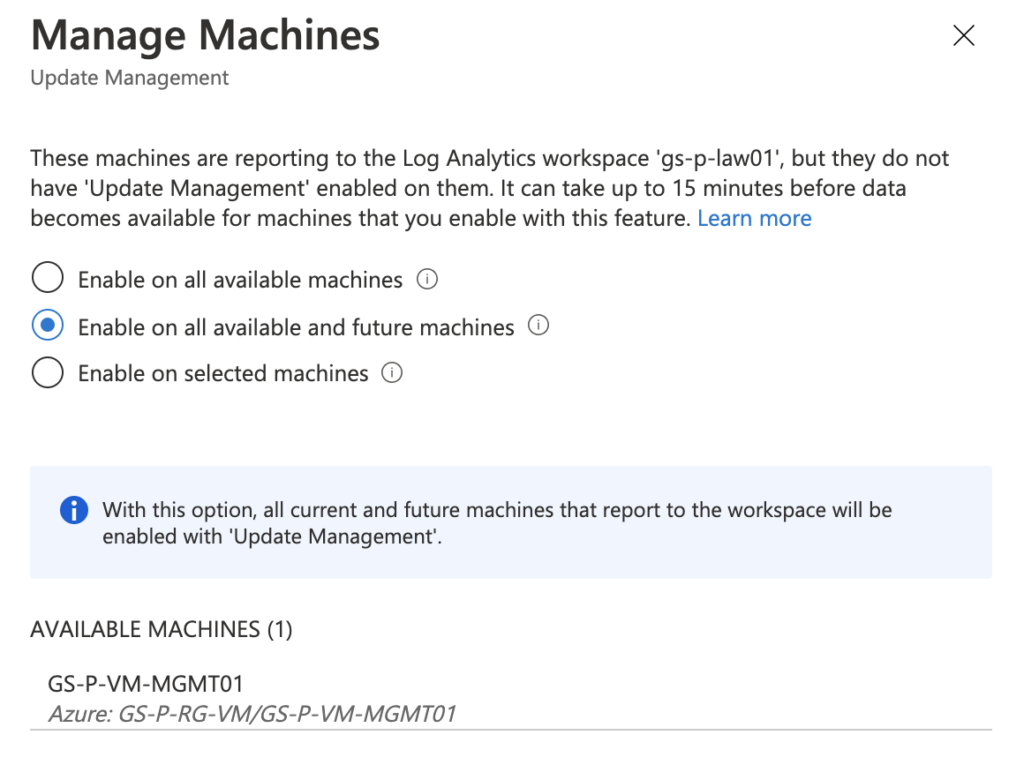
Refresh the page and click on “Manage Machines”
I recommend setting this to “Enable on all available and future machines”. This makes adding new machines to deployment schedules a lot easier.
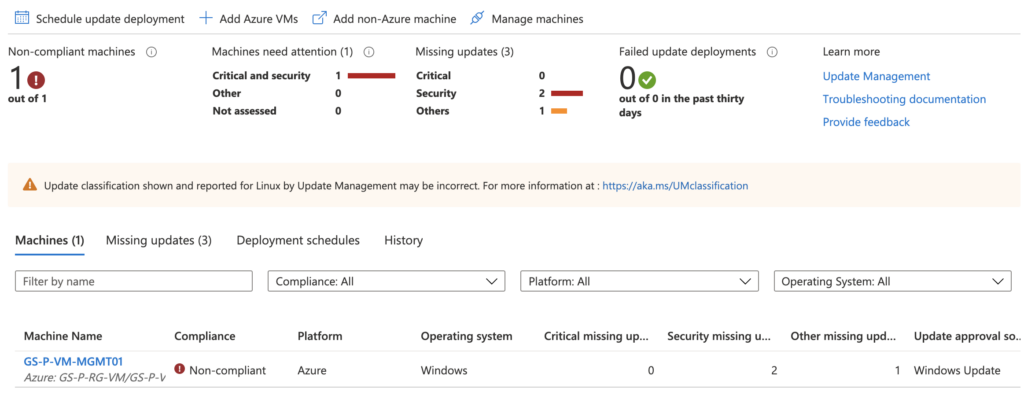
After assessment you will get an overview of all Virtual Machines reporting to Update Management, their compliancy state, missing updates and deployment schedules
Add On-Premises machines to Update Management
Install the Microsoft Monitoring Agent (MMA) on your machine. You can find the installation file within your Log Analytics Workspace in Azure under “Agents Management”
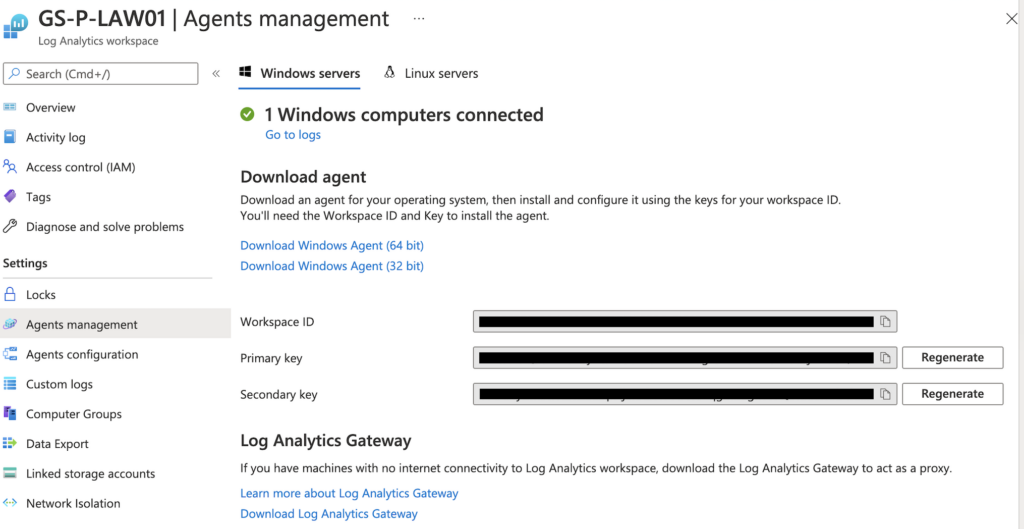
Open the AgentControlPanel. You can find this under C:\Program Files\Microsoft Monitoring Agent\Agent
Click on the second tab “Azure Log Analytics (OMS)” and click on “Add”
Enter the Workspace ID and Primary Key of your Log Analytics Workspace and apply
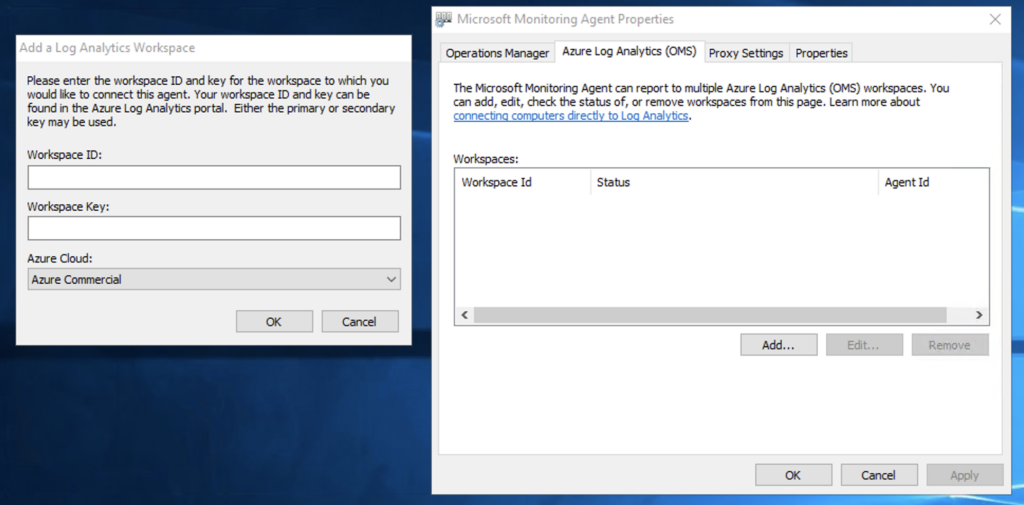
After a succesful connection these machines will be available in the Azure Update Management solution. You can add these to deployment schedules the same way as Azure Machines.
Creating your first schedule
You now have your Update Management solution set up and the next thing you want to do is create a deployment schedule. This is where you setup your preferred maintenance windows for patchmanagement.
You can deploy multiple schedules. I recommend creating multiple schedules to keep a good overview like a split between your Production and Development resources, schedules per application group or if you have multiple Domain Controllers for example you can split them in different deployment schedules to make sure they don’t reboot at the same time, keeping one of your DC’s available during the update process.
Click on “Schedule Update Deployment” and start with giving your schedule a name:
Example: “Production – First Saturday – 2AM”
Now you can add the machines you want to include in the schedule.
Groups to Update allows you to automatically add machines to your schedule based on Subscription, Resource Groups, Locations, Tags or AD Groups
Machines to Update allows you to add machines manually.
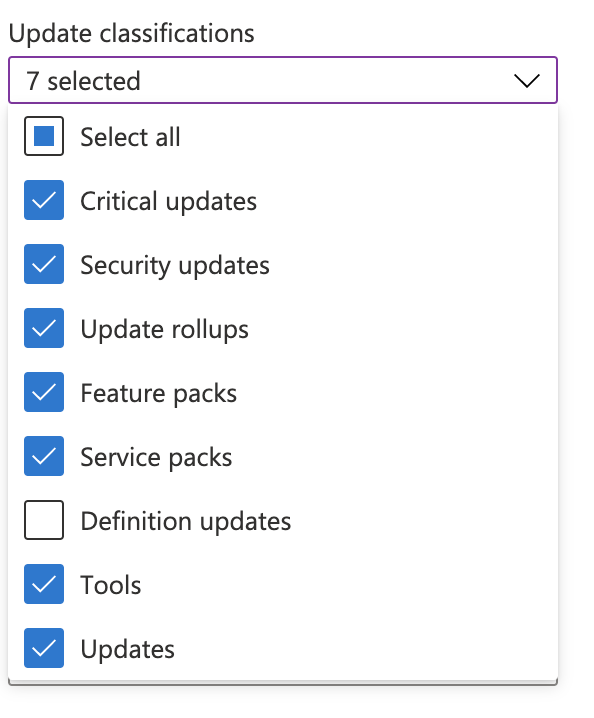
Update Classifications allows you to include or exclude certain categories
I recommend setting up a Daily Schedule for Definition Updates to make sure your machine is protected with the latest definitions at all times. This will not require a reboot and is safe to run during production.
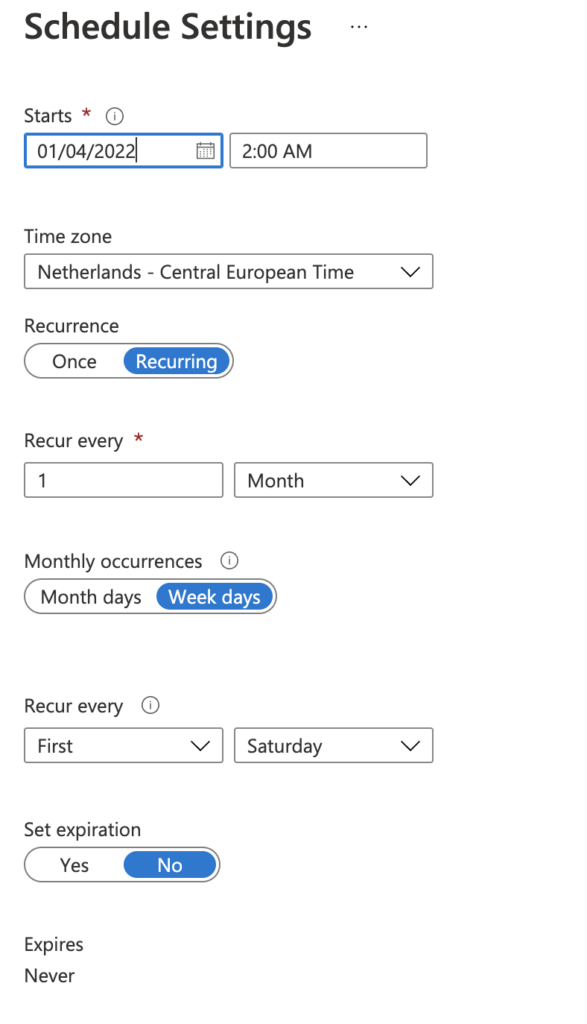
Schedule Settings is where you set up your one-time or recurring schedule.
Post and Prescript allow’s you to run scripts before and after the schedule like e-mail notifications or start/stop scripts to turn your machines on prior to the maintenance window.
Maintenance Window is the time you give your schedule to complete the Update process. If your deployment runs longer than the maintenance window you specified the job will be cancelled.
Reboot Options defines what the machine will do after updates are downloaded or installed. If you want your updates to be installed completely always leave this on “Reboot if required” or “Always reboot”
After saving your deployment schedule(s) you can see some basic information under “Deployment Schedules” and edit your schedule quickly by clicking the three dots.

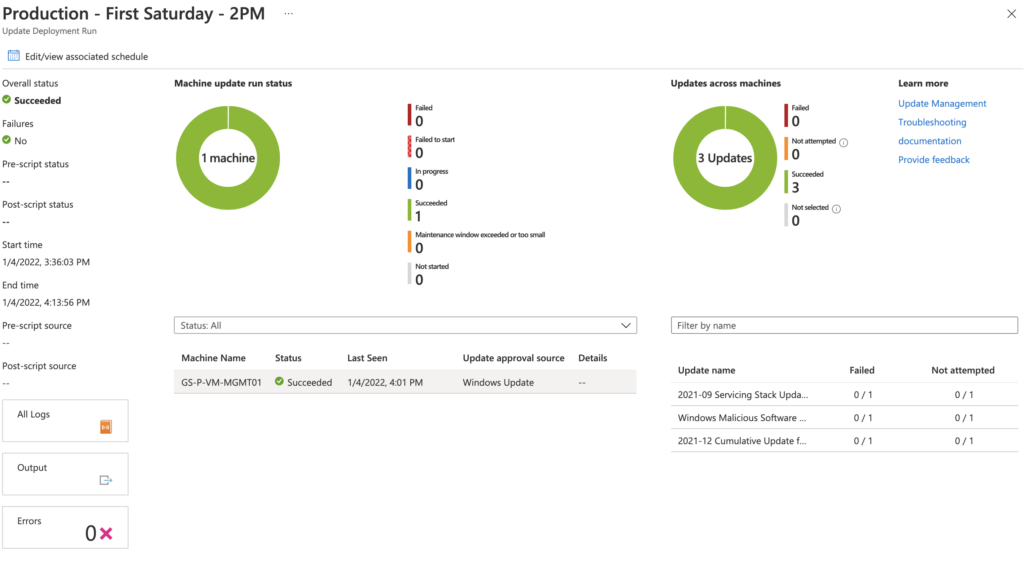
First run
Under history you can find your running or past deployments.
When you click no it you will see an overview of your completed and failed updates. You can also deep-dive into logs if you want to troubleshoot any errors you may encounter. In a future post I will write about the most common errors you may encounter and how to remediate them.