Introduction
Patch Management is important and with tools like Azure Update Management or other third party tools you can make your life a lot easier. No more weekends patching server and more quality time with your friends and family! Just don’t forget to turn off Automatic Updates and avoid random reboots that aren’t part of your preferred schedules!
Using PowerShell
If you manually want to disable automatic updates for a server you can use ‘sconfig’
- Open PowerShell as Administrator.
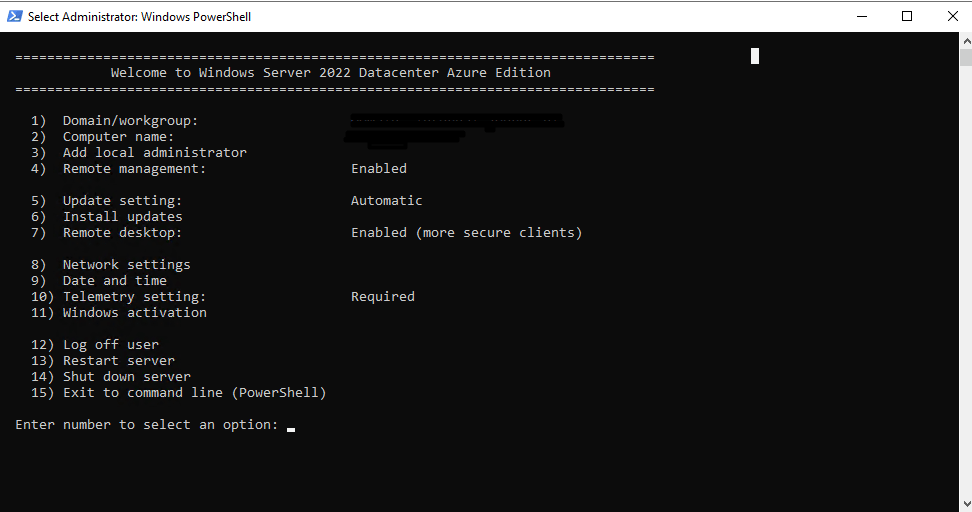
- Type “sconfig” and press Enter.
- Press 5 to access the Windows Update Settings.
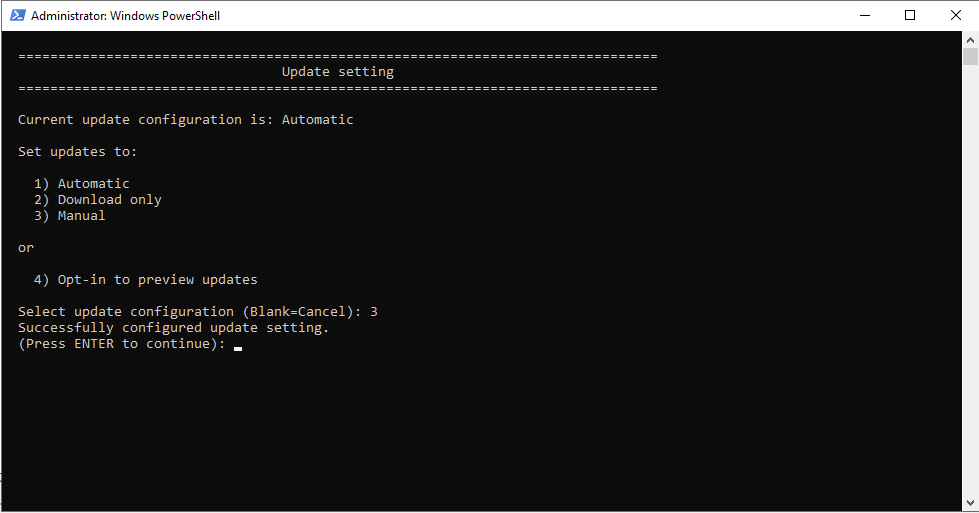
- Press ‘2’ for Manual or ‘3’ for Download Only if you prefer to download updates but not install them automatically.
- Press Enter to apply the changes.
Using Group Policy
- Open the Group Policy Management Console on a Domain Controller.
- Create a new Group Policy Object (GPO) or edit an existing one that is linked to the desired servers.
- In the settings navigate to “Computer Configuration” -> “Policies” -> “Administrative Templates” -> “Windows Components” -> “Windows Update”
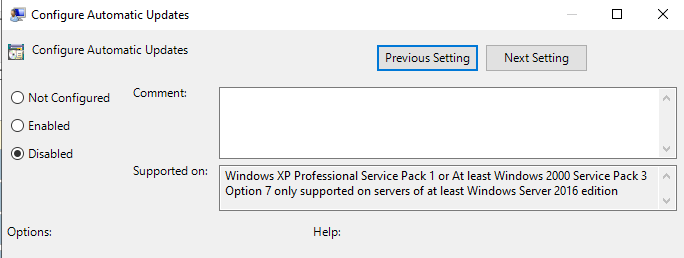
- Find and select “Configure Automatic Updates” and set the policy to “Disabled”
- Apply the changes to the GPO. They will take effect on the targeted servers during the next Group Policy refresh cycle.